Showing posts with label cooking. Show all posts

Sunday, November 9, 2014

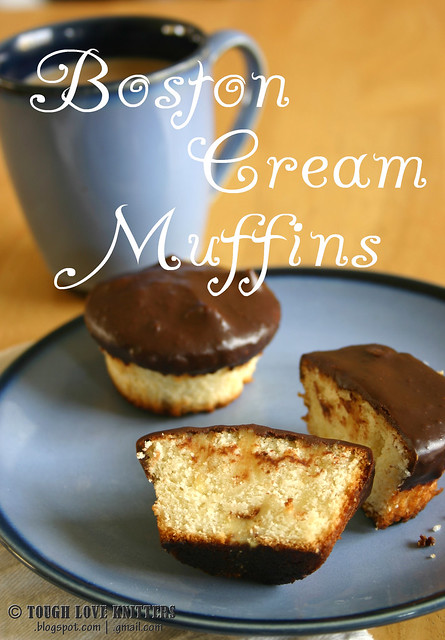
Boston Cream Muffins ...ok, ok ... cupcakes

Title

Big Y supermarket has a great muffin section -- big ol' bran muffins, chocolate chocolate-chip muffins, and ... wait for it ... Boston Cream Muffins. Big, giant, Boston Cream Muffins. They're hard to resist. But my wallet and my wastline need me to resist them. So we're implementing the very useful "Make it Yourself" rule -- if you make the food yourself, you will naturally eat more "real" food and portion-control the "not food", because "not food" is super annoying to make yourself. E.g. Apples are real food, and are really easy to "make" -- just pick them up and eat them. Home-made oreos, on the other hand, are kind of a pain to make -- the cookie dough, you gotta cut or roll the cookies really small, bake them and don't burn them, mix the filling, spread the filling, etc. Not hard, it just takes a long time. And while home-made oreos are technically "real food", since they're made with real ingredients, they're not all that good for you. But they're such a pain to make, I'm not going to make them very often. Hence, built-in portion control.

Cue Boston Cream Muffins. Now a quick internet search informed me that there is no such thing as a boston cream muffin, that they are actually cupcakes. And I'll admit, my rule is usually No Frosting = muffin, Frosting = cupcake. So the chocolate topping makes these cupcakes -- fine.

After that, the internet was super disappointing. All the recipes (except Martha) called for Cake Mix from a box, and Instant Vanilla Pudding. If I wanted this to be easy ... I would just buy the muffin from Big Y. So we did some mixing-and-matching.

Cupcakes, from Sally's Baking Addiction

Vanilla Cream Filling, from Martha Stewart

Chocolate Ganache, from Food Network


Side-Note -- since Daylight Savings Time ended last week, any sort of afternoon cooking is now done in the dark. Please excuse the bad lighting.


Vanilla Cream
You may end up needing more than these original measurements (see Finishing below), probably doubled for a 24-cupcake batch.

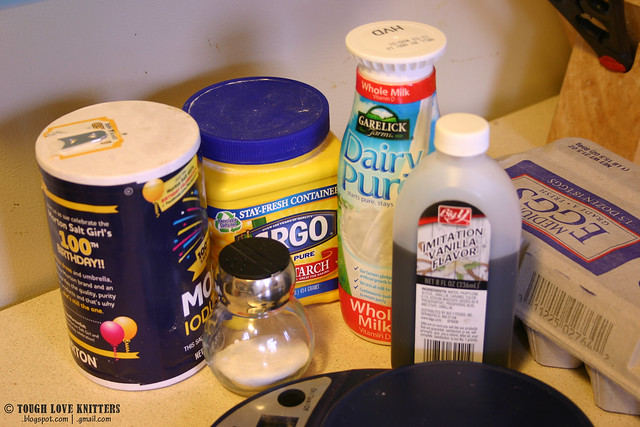
Ingredients
2 large egg yolks
1/4 cup sugar
2 tablespoons plus 1/2 teaspoon cornstarch
Pinch of salt
1 cup whole milk
1/2 teaspoon pure vanilla extract
Boston Creme Cupcakes (1)

Separate eggs, and set aside whites (yummy breakfast for tomorrow!). Whisk yolks until smooth.
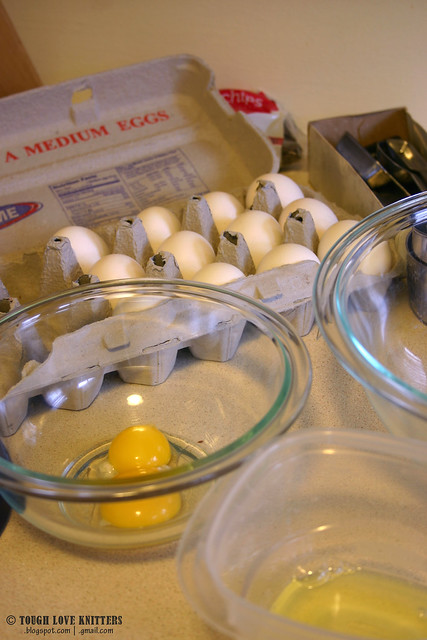
Boston Creme Cupcakes (2)

Mix sugar, cornstarch, and salt in a medium saucepan over medium heat. Add milk in a slow, steady stream. Cook, stirring, until mixture begins to bubble and thicken, about 5 minutes.
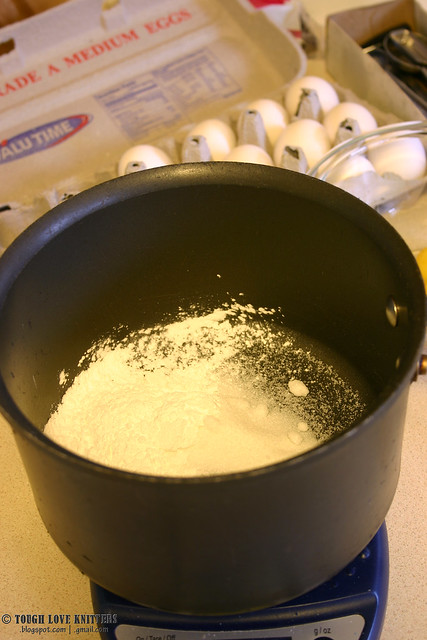
Boston Creme Cupcakes (3)

Pour 1/3 of milk mixture into yolks, whisking constantly. Return mixture to saucepan, and cook over medium heat, stirring often, until thick, 2 to 4 minutes. Stir in vanilla.
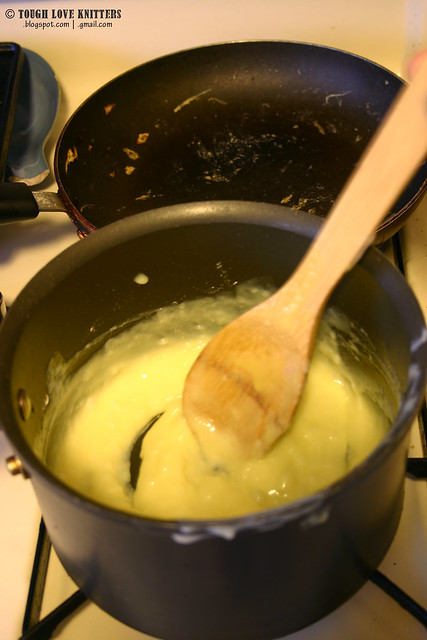
Boston Creme Cupcakes (4)

I love cooking that turns into chemistry totally amazes me. And if high school chemistry had been this yummy, I probably would have done better.

Pass vanilla cream through a fine sieve into a bowl.
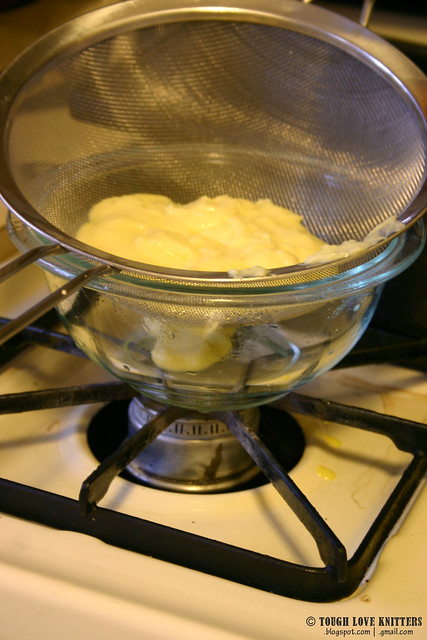
Boston Creme Cupcakes (6)

Press plastic wrap directly on surface. Refrigerate until cold, at least 1 hour, or up to 2 days.
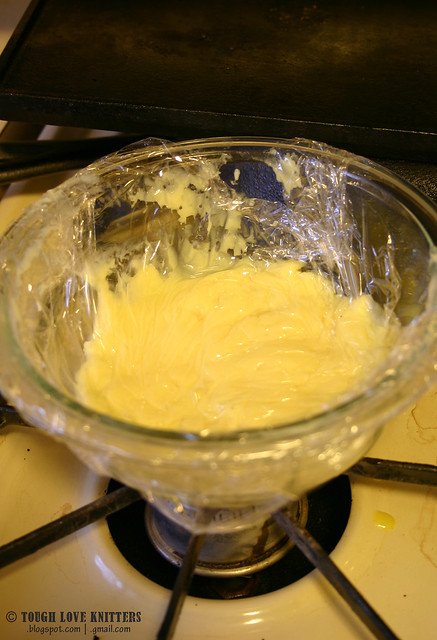
Boston Creme Cupcakes (7)

Cupcakes
These were yummy, but they did not come out of the silicone muffin cups easily. Also I reduced the recipe to make only 12 cupcakes, and the batter ended up making 19. So ... not sure what to tell you. These are original measurements, which the original author says makes 16. Maybe they're 16 really BIG cupcakes. I'd say this would make 24 normal-sized cupcakes, which means you'd probably need more cream-filling than the recipe above.

Ingredients
2  1/3 cups (292g) all-purpose flour
2 1/2 teaspoons baking powder
1/2 teaspoon salt
12 Tablespoons (180g) unsalted butter, softened too room temperature
1 3/4 cups (350g) granulated sugar
2 large eggs, room temperature and separated
3 teaspoons vanilla extract
1 cup (240ml) whole milk


Preheat oven to 350F degrees. Line a muffin pans with cupcake liners.

Whisk the flour, baking powder, and salt together in a medium bowl. Set aside.
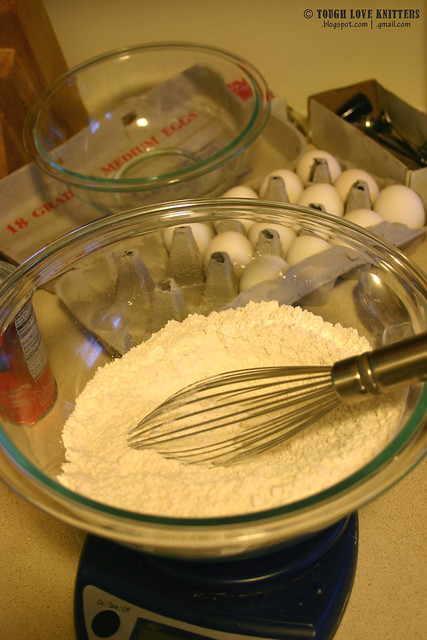
Boston Creme Cupcakes (8)

Beat the butter on high speed until smooth and creamy - about 1 minute. Add the sugar and beat on high speed for 3-4 minutes until creamed together fairly well.
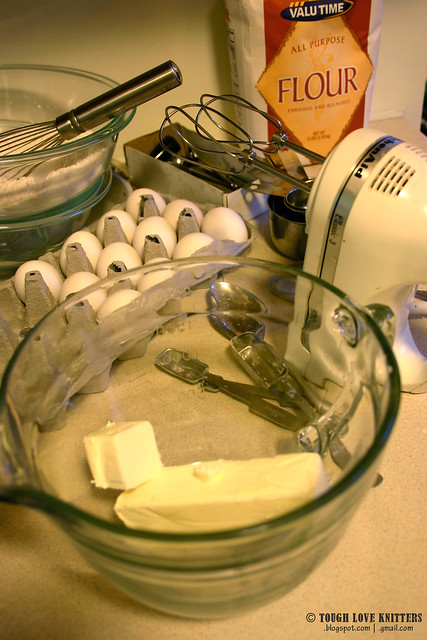
Boston Creme Cupcakes (9)

Separate eggs. Add yolks and the vanilla to butter mixture. Beat on medium-high speed until combined.

With the mixer on low speed, add the flour mixture and milk (alternate adding flour and adding milk 3 times).
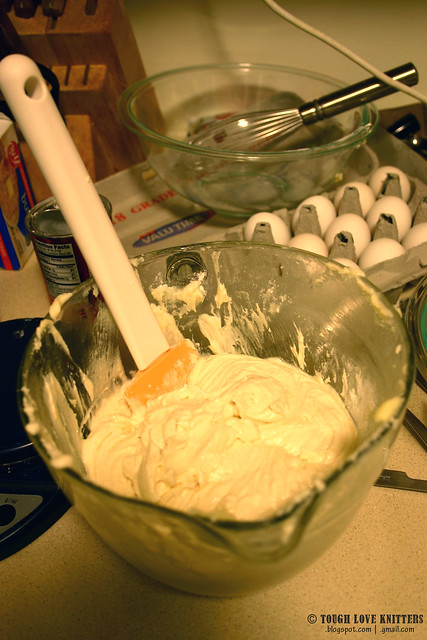
Boston Creme Cupcakes (10)

Whisk or beat the egg whites until thick and foamy, about 3 minutes. Fold into cupcake batter.

Boston Creme Cupcakes (11)

Spoon batter into cupcake liners filling 1/2 - 2/3 of the way full. Bake for 18-21 minutes or until a toothpick inserted in the center comes out clean. Allow to cool in the pan for 5 minutes, then transfer to a rack to cool completely.
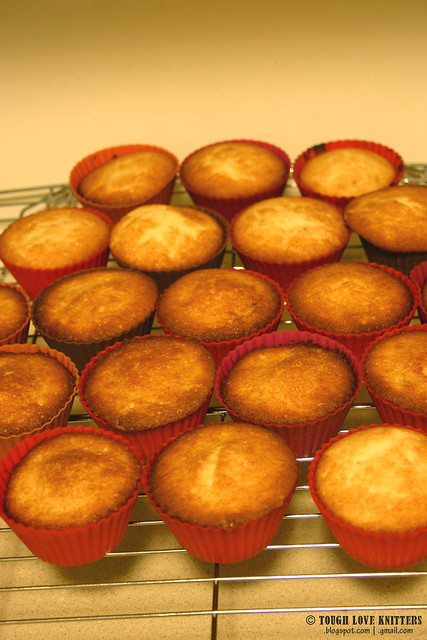
Boston Creme Cupcakes (12)


Chocolate Ganache
These are the original amounts, which made WAY too much ganache for 19 cupcakes. I'd cut this in half for a normal 24-cupcake batch.

Ingredients
1 cup heavy cream
1 (12-ounce) package semisweet chocolate morsels


Heat cream in a small heavy saucepan over medium heat until bubbles appear around the edges.

Boston Creme Cupcakes (18)

Remove from heat, add chocolate morsels to pan, and whisk until smooth.
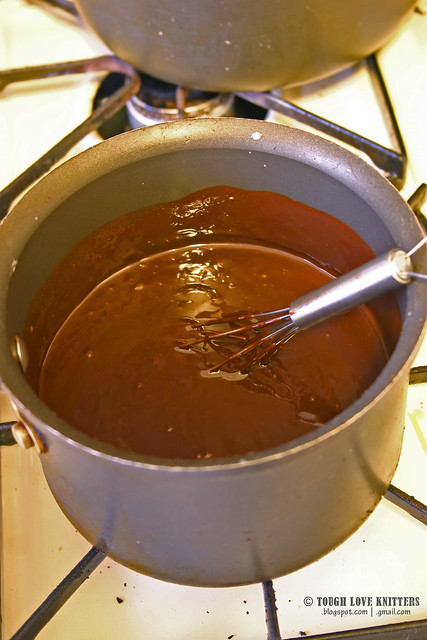
Boston Creme Cupcakes (19)

Spoon or drizzle glaze over cupcakes, or dunk the tops into the glaze (do this AFTER you put the cream into the cupcakes, below).
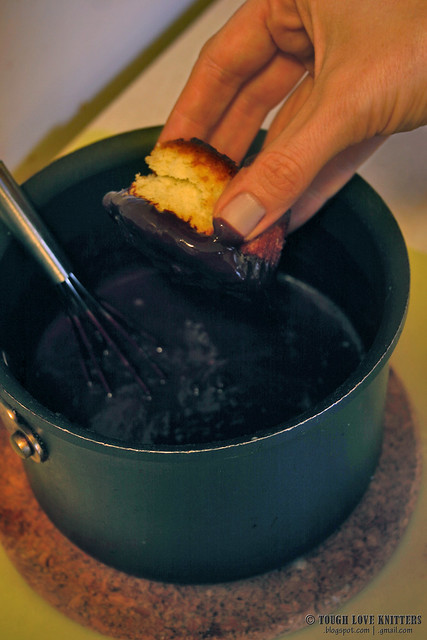
Boston Creme Cupcakes (21)


Finishing
Here's what I did, and here's how it didn't quite work.

Spoon vanilla cream into a frosting bag with a long tip.
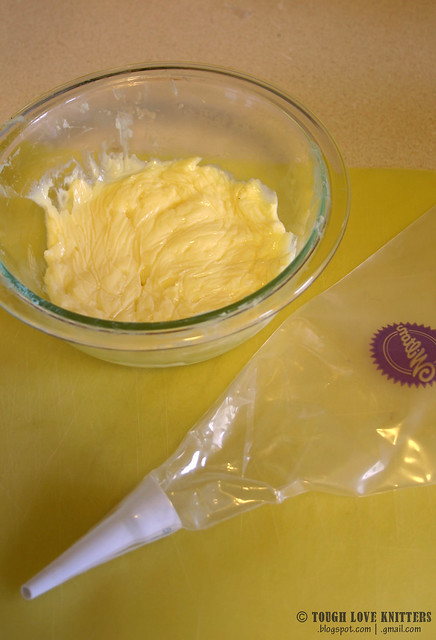
Boston Creme Cupcakes (13)

Insert tip into cupcake and squeeze filling into cupcake.

Boston Creme Cupcakes (15)

Boston Creme Cupcakes (17)

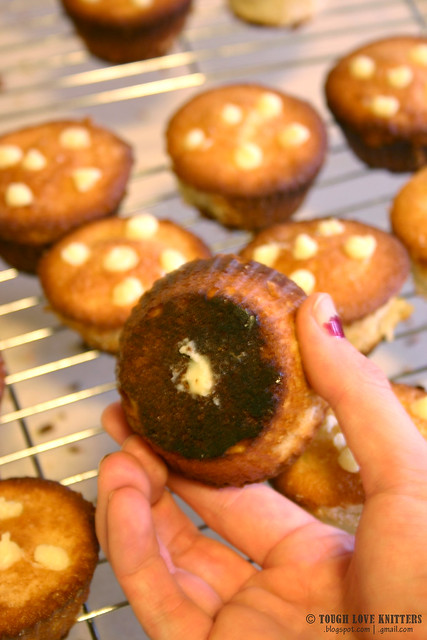
**Here's what I did wrong. I didn't put ENOUGH filling into each cupcake. I ended up putting 5 or 6 small squeezes into each cupcake, and it either wasn't enough to taste it, or the cream was absorbed into the cake. It really didn't feel like a good mouthful of cream ... that's what she said.

Boston Creme Cupcakes (24)

Next time I think I will actually cut a hunk of cake out of the center of the cupcake and fill it will cream -- that way I can see how much is getting in there.


That being said, they were still pretty good. I mean, it's cake and frosting, and when you pretend it's a muffin, you can have it at 10am with a cup of coffee. That's heaven in my book.
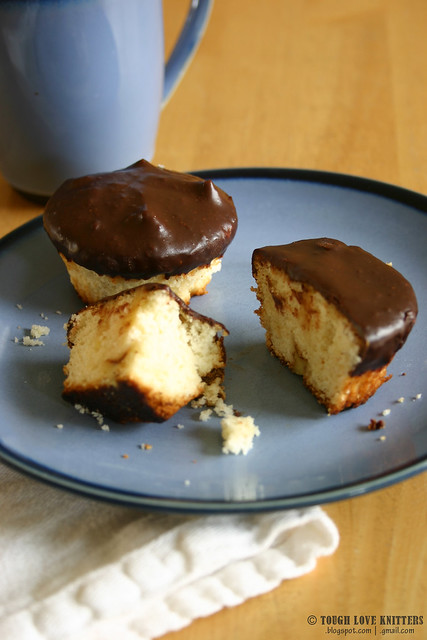
Boston Creme Cupcakes (27)

Thursday, May 29, 2014

Apparently I'm in charge of Cooking now

I'm a lucky girl. My husband LOVES to cook. He talks fondly about the Christmas when my mother gave him a cast-iron skillet and his life changed forever. Sundays at our old apartment were a sight -- 3 or 4 dinners at once, plus bread and some sort of pie. During the week I would get home too late to help keep baby out of the kitchen long enough for a nightly dinner-prep, so we just filled the fridge on Sundays and ate "leftovers" all week. It was amazing.

But then we moved. Chris still cooked, and I sort of felt guilty about being home but not being able to prepare more than a PB&J or spaghetti on nights when he had to stay late. Mostly because, while we make a meal-plan, Chris didn't always follow specifically and I didn't know what he was thinking on any given day. But then his co-engineer fell ill and Chris is now doing the work of two. Coming home on time is not in the cards at the moment. So I'm now in charge of dinner.

First step was to clean up the meal-planning software. We use Plan to Eat, which is AWESOME. OMG, totally worth the money. They do 30-day free trials, so try it out and see. It takes some setting up, because you have to get your recipes IN there, but once you can plan and cook right from the site, ... amazing. You can drag and drop your recipes into a calendar, and then it will generate a shopping list for you based on your meal plan for the week. It combines similar ingredients ("sugar" and "Granulated sugar") and totals up the measurements. You can save several stores, so you can mark certain items for Stop and Shop and certain items for Big Y (or certain items to the "sale only" store, which is what we do -- things that we'll need eventually, but for the moment only need to buy if they're on sale). The mobile site is great, and you can check off your list as you shop, and the "Cooking View" for the recipe pages is awesome for cooking -- step-by-step pages that highlight the ingredients one at a time. It imports recipes from mainstream cites like Cooking Light and MyRecipes, and for blogs pages and non-mainstream sites, there is a "bulk importer" where you paste in the text and it translates into the recipe format. If it would only come up with a way to scan a recipe from a photo or something, that'd be brilliant.

For planning, you can set the recipe's course (main course, side, breakfast, etc.) and cuisine (mexican, asian, etc.) and main ingredient (chicken, beef, rice/grain, etc.). Chris hadn't been using those, so step one for me was to go through all our "main course" recipes and set the main ingredient and cuisine, because that's how I like to plan -- every week gets Breakfast for Dinner (Friday), Fake-Out (Saturday, more on that later), something new/difficult/fancy (Sunday), and pasta (Wednesday). Thursday is leftovers. I love mexican, so each week gets a mexican dish, alternating main ingredient (chicken, pork, ground turkey, pasta). I don't love fish, but know it's healthy or whatever, so every other week there's a fish. I'm fine with at least 1 or 2 chickens every week, and then I fill in the rest with ground turkey, pork, vegetarian.

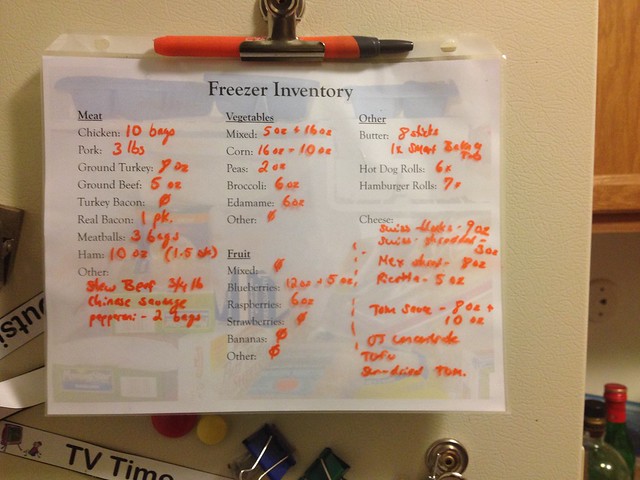
Next, the freezer. We buy meats in bulk and separate them into baggies for quick defrosting. But the rest of the freezer was a mess, literally. I needed to find out if we had frozen jalapenos for my corn salsa, and an hour and a half later I had a way-too-precise list of the entire contents of our freezer. (Side note: when we have another baby, we're getting an apartment-sized chest freezer, no matter where we live. Fill it with dinners pre-baby, fill it with breastmilk post-baby. When baby's grown/weaned, sell it on Craigslist. Boom.) Now that list is posted with a dry-erase marker, and the goal is to keep it updated so one does not need to stand in front of an open freezer digging for what you want, AND to be able to take a photo of the list before leaving for the store, because there is ALWAYS that moment of "Oh! ___ is on sale! .... but I can't remember if we have any in the freezer." Of course, this plan involves everyone pulling their weight, so we'll see how it goes.

Freezer Inventory

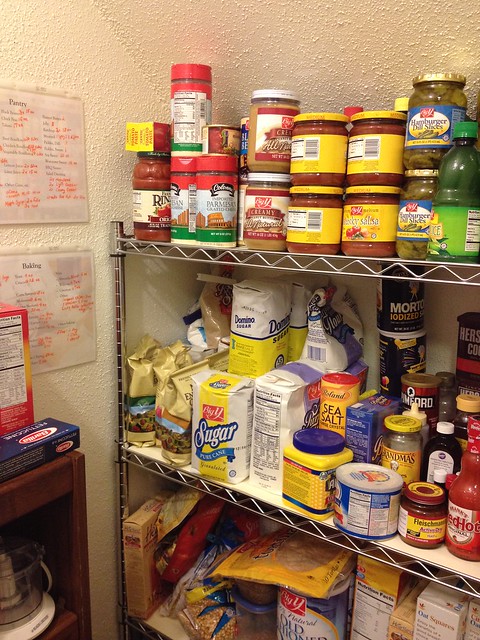
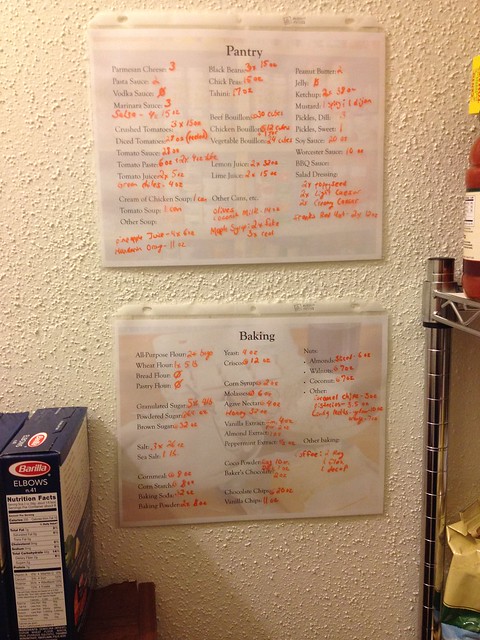
After that, the pantry. Same issue -- we buy in bulk, but live in an apartment, so it's packed pretty tightly in the room off the kitchen (where most people put a washer/dryer). This one took a a little longer.

Pantry

Pantry Inventory

The hard part here will be keeping track WHILE I'm cooking -- I jump in there to get the tomato paste, but I have to either mark it down then (while I probably have something on the stove), or remember to go back later. We'll see.

Finally, we're going to actually mark down which recipes we like and which were a flop, instead of remembering "oh, that one with the greenbeans and the sauce, I didn't like that one." For example, last night's pasta with spring vegetables with cream sauce looked great until it told me to add bread crumbs, which sucked up all the sauce and basically made cheese globs. Tasted fine, but globby cheese is not Chris's thing. So after dinner I went back and took out that ingredient (and switched peas to something else ... I'm seriously married to a toddler), so next time I won't have to remember that that's the part we didn't like.

Let's get cooking!

Saturday, April 26, 2014

Sometimes you feel like a ...

Apparently we didn't have enough sweets at Easter. I felt the need to make cookies. But we had all the ingredients in the pantry ... so they're free, right?


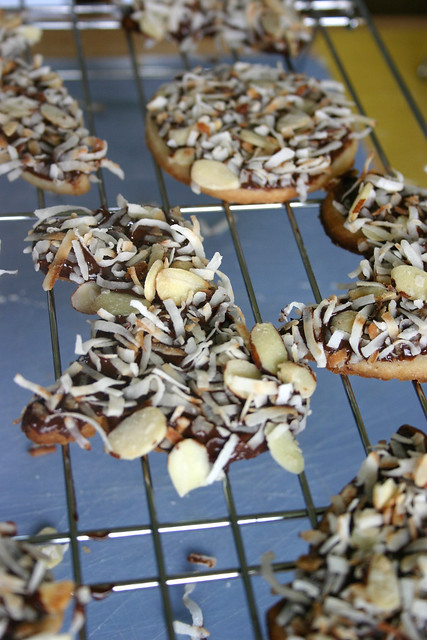
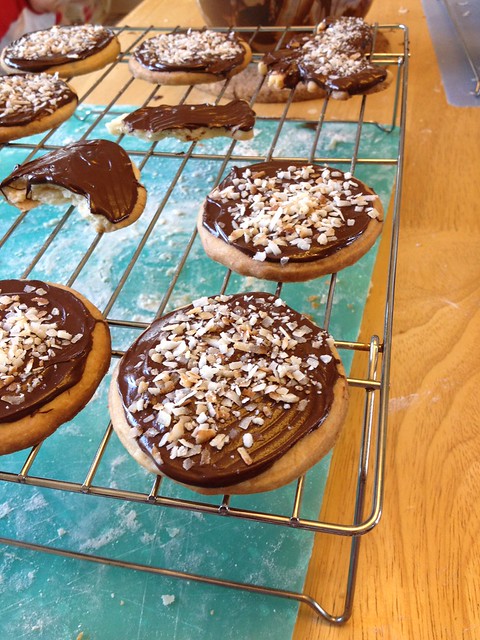
Almond Joy Shortbread Cookies
(or Mounds Cookies, for those without Joy)

Ingredients


1/2 cup (3.5 oz) granulated sugar
2½ cups (11.25 oz) all-purpose flour
Pinch salt
10 oz butter, room temp
12 oz semi-sweet chocolate chips
7 oz sweetened coconut flakes
1/2 cup slivered almonds
Cookies Cutters


Directions
  1. In a small sauce pan over medium heat, toast coconut and almonds, stirring frequently. (Omit almonds for boring-old Mounds cookies.) When coconut flakes have turned golden brown, remove from heat. Pour into a bowl and set aside.
  2. Combine butter, sugar, and salt with a mixer. Add flour slowly and mix on low speed until blended.
  3. Spread dough flat between two sheets of wax paper and refrigerate until firm.
  4. While waiting, snack on dough ... it's fine cause there are no eggs in it ... as if that ever stopped me.
  5. Preheat oven to 350 F. On floured surface, roll dough flat until 1/4" thick. Cut with cookie cutters or circular glass, and place a cookie sheet lined with parchment paper. Roll again and repeat until you have used all the dough.
  6. Bake at 350 F for 8-10 minutes, until the edges are golden brown. Cool on wire rack.
  7. Melt the chocolate in a microwave or over a double-boiler.
  8. Dip top of cookie in chocolate (or spread with a frosting knife), then dip in bowl of coconut/almond mixture. Place face-up on wire rack to cool.
  9. Eat every cookie. Complain that you have a belly-ache.
Makes about 24-30 3" cookies.

Yum, city.

Almond Joy Shortbread Cookies

Untitled

Monday, February 24, 2014

Stove-Top Popcorn, like a boss


I have a long history of sucking at making popcorn on the stove. In college, my roommate Maggie and I could have contests involving the number of kernels left at the bottom of the bowl. If your batch had less than 6, you got a free beer. If you had zero kernels left, I think you got a six-pack. I'm not sure I ever finished paying off all the beer I owed her.
In grad school, my roommate Rachel and I would make popcorn and watch Sex and the City ... and study. Cause we were lame. But I still wasn't all that good at it.


Cue Pinterest. Oh, Pinterest. You never really failed me ... until now. Even pinterest couldn't fix my popcorn predicament.

And then I sort of solved it by accident.

Here we go. Forgive the lack of measurements ... I tend to wing it in the kitchen.


Perfect Stove-Top Popcorn

Ingredients:
Vegetable/Canola Oil
Pop Corn Kernels
Any toppings you want (butter, salt, etc.)

In a 1-1/2 qt sauce pan, pour enough oil to just cover the bottom. Throw in about 10 popcorn kernels. Cover and shake a few times so kernels are coated with oil. Place over medium heat and walk away for a minute. I mean, don't leave the house with the stove on, but you can do dishes or something. This part is going to take a few minutes. Ever minute or so go back and shake the kernels around. You'll notice that they'll start to turn golden. When they start to pop, keep shaking the pan above the heat so they don't burn. Once they all pop (you'll know because you won't hear any "clinking" in the pan from the kernels), dump them into a bowl. Put another layer of oil down and throw another handful of kernels in (about a Tbsp), and shake a few times until coated. Because the pan is already the right temperature, the oil will heat quickly and the kernels will pop fast! As soon as they start to pop, keep shaking until all popped. Repeat until you have as much popcorn as you want.

Why this works: I used to put in as many kernels as the amount of popcorn I wanted. This didn't work because there were too many kernels, they would get stuck in the middle of the popped popcorn and not pop. Doing it in small batches means all the kernels get oil and touch the bottom of the pan, so they'll all get hot enough to pop. Also, when there are only a few kernels, you'll hear when it's done and won't keep the pan on the stove too long (which prevents burning).

Enjoy!!!

Monday, December 30, 2013

Caprese Salad Snowmen

I was shocked -- SHOCKED I tell you -- to discover that someone on Pinterest had not yet already made these. I expect to become a Pinterest celebrity with this one.


I came across the idea while watching Curious George "A Very Monkey Christmas" ... Rowan wanted to watch it, I swear. The Man with The Yellow Hat loves these, apparently. The Italian chef makes them with Mozzarella and tomatoes. George tries to replicate them as a gift. In George's fashion, he fails and makes a big mess. Sorry, spoilers.

Anyway, these were so simple to make.


Ingredients:
Cherry Tomatoes
Fresh Basil leaves
Fresh Mozzarella Cheese (either in balls or a solid block)
Toothpicks
Balsamic Vinaigrette Dressing

Directions:

1. Cut bottom off cherry tomato. This allows the tomato to stand up alone, and create the hat for the snowman.


2. Insert toothpick into top of tomato.


3. Carve out a ball of mozzarella, if using a block. Shape into a sphere and place onto toothpick on top of tomato.


4. Fold Basil leave in half and place onto toothpick.


5. Make a smaller sphere of mozzarella for the head (I used pieces that broke off while shaping the body piece). Place on toothpick.


6. Place tomato "hat" on toothpick.


7.  Serve with Balsamic Vinaigrette Dressing.

8. Create a Snowman Army that will defend you snack table (optional).


Enjoy!!!

Sunday, January 13, 2013

I grew that from nothin'!

I feel like everyone I know has been on this whole "eat locally", gardening thing lately. They're all "Hey! I grew green beans!" I'm jealous for several reasons:

1) I hate paying for things I can just do myself (I really should have named this blog, "Hey! I can just make that myself!").

2) I am all for vegetables and herbs and stuff. We've been good about cooking at home and having veggies at every meal.

However, there are some very serious challenges to the whole "growing things" goal:

1) I kill everything. Like, everything. I've had one plant survive my attempts at cultivation, but even that one is looking pretty sad.

2) I live in an apartment in New York City, so gardening is tricky.

However, the internets abound with ways to have pretty, indoor, useful gardens.

DIY: Herb Garden

I got a window box from Home Depot and some seeds from Amazon (the lady at Home Depot gave me a snide "Um, no, it's a little late in the season for herbs" ... yeah, that's why I'm doing them inside my sauna of an apartment). 

For my first attempt I used old plastic cutting boards to divide up the window box into 10 sections and planted a different kind of seed (in alphabetical order of course ... Basil, Chives, Cilantro, Dill, Lavender  Oregano, Parsley, Rosemary, Stevia, Thyme). 

The internet told me it could take WEEKS to sprout anything, but probably within 5 days I had my first sprouts! They were so cute!

077
I think that's the basil 

I let those grow, and after a few weeks I had sprouts for basil, chives, cilantro, dill and parsley. The rest had nothing. I transferred the growing ones into their own pots, which did NOT go well. Everything except the cilantro and dill died, almost instantly. 

For my second attempt, I replanted the basil, oregano, and parsley seeds straight into their own pots; I didn't want to deal with replanting them. It worked much better.

067

8BB9FC2B-4B45-442F-9F3D-E7711CC9D9E9

Herb Garden

The parsley and basil sprouted immediately, and the oregano is weak but growing. I replanted the others in the window box again, and again, nothing. I have to do a little more reading and see what I'm doing wrong.

Then Chris surprised me with Pepper seeds! I planted those in the window box, and look what was waiting for me after we got back from Christmas?!

Herb Garden

On New Year's Day I always have to eat beans (thanks to Nana, who gives everyone baked beans for Christmas, even though my mom is the only one who eats them) -- Eat like a Pauper on the first of the year, and you'll eat like a King for the rest. This year we made fajitas (chicken for Chris, black beans for me), and tried to make them taste as close to Chipotle as possible. And for the Cilantro Lime Rice, I used the cilantro from my window!!! I was so proud!!!

New Year's Beans

Problem:
The clay pots really dry out the soil, so the ones in clay pots are bone try but the ones in the plastic pots are getting moldy! I read here about soaking the pots in water from the bottom instead of watering them from the  top (which could flush the nutrients down and out the bottom).

Soaking Herbs

They look so much better! The internet said I wouldn't have to water then again for weeks ... I don't quite buy that, but we'll see.


Wednesday, February 22, 2012

Super Bowl Food!

Thanks to my new best friend, Pinterest, I had the BEST ideas for our Super Bowl party this year!

Gridiron Guacamole

Pinned Image

Pigskin Pizza

Pinned Image

Strawberry Sacks

Pinned Image


And while my pictures were not as professional as those above, the food tasted just fine!


Super Bowl Pizza

Super Bowl Pizza

Super Bowl Strawberries

Super Bowl Dip

Super bowl cupcakes

(Wish I could take credit for the cupcakes, but those were Jenn Y's)

Wednesday, June 29, 2011

Meal Planning and "Plan to Eat" review

In an effort to save some time and money, we've been "meal planning" for a while. I did this for a few reasons:
1) We were not so good at "what should we have for dinner tonight?" and getting dinner prepared and eaten before 10pm.
2) Even when we thought about it in terms of "what should we have for dinner THIS WEEK", we were still stopping at the store every day on the way home, which was leading to a lot of extra purchases and lots of extra money.
3) When I got pregnant, I immediately became too tired to eat a late dinner, and eventually got too fat to stop at the store on the way home.

So over the past few months, we've evolved our meal planning technique. I have two excel documents: one has lists of our favorite dinners, and lunch and snack ideas; the other is a calendar where I plan out the dinners.


I plan about two months at a time. First I go through and put in any special plans (like classes, people visiting, or holidays). Then I go through and rotate the "protein", weighing more heavily on the chicken, since it's easier. Then I go through the lists of dinners, separated by protein, and then fill them in. Then I go through and fill in the grains/starches/side dish ideas. I usually leave the vegetables until the week of, and we buy them fresh. If there is a recipe link, I hyperlink right there in the file, so I can find it easily when it's time to cook.

Here's where it gets tricky. The next step is to make a grocery list from the meal plan. Ideally, we make a list of everything we need and then go through the pantry to see what we already have. Then we do a HUGE Peapod order with everything else. We first started using Peapod in January, when I was too pregnant to carry home cranberry juice, and I LOVE it! We'll do a massive order every month (or two), with all the meat and non-perishables we'll need for the whole month (or two). We can order bulk packages of chicken and pork chops, and a few packages of ground turkey, and then separate out serving sizes in freezer bags. Then when it's time to defrost, I can just take out one bag. The problem arises when I forget certain ingredients and they get left off the grocery list . . .

Here is where "Plan to Eat" may save my life.

I first saw this on the Simple Mom blog, and there is a cool "tour" on the sight. I signed up for the one-month trial and played with it over the weekend.

First I put in the recipes for things we'd be eating this week. You can import recipes from lots of websites, including SparkRecipes.com (I've been trying to get back into using SparkPeople.com, with varying success). Then I put all the plans into the calendar page.


What I like:
- There are Breakfast, Lunch, Dinner, and Snack sections, so I can plan out my work snacks.
- I can add "Events" just like in my document
- I can add "ingredients" for random things I want to cook or eat, like "brownies" or Gipper's birthday cake.
- I can drag and drop from the list onto the calendar
- It easily links to the recipe

What I don't like (or haven't figured out how to do yet):
- I can't customize the colors
- In my excel doc, I have slots for the protein, vegetable, and grain/starch, to make sure I have one of each at each meal and it's easy to see what's been planned and what hasn't. This calendar is a little harder to read.

Based on your meal plan, it then generates a Shopping List. This part is AMAZING so far! It reads the recipe and includes EVERYTHING (including "water", which I think is funny. My dad would always joke "where am I supposed to find water at this time of night?!" when he'd see it in a recipe). It separates things into departments (produce, dairy, etc.), you can you edit these if you need to. You can also specify different stores, in case the isles are set up differently.
What I Like: It adds up all the quantities needed of ingredients across all your recipes, and then links back to them so you can see what the ingredient is being used for.

The mobile site is great. It has a super easy and check-off-able list that I can pull up on my phone. So after I finished the plan for the week, I took my phone into the kitchen and checked off all the items I had already. Then all I had to take to the store was my phone, and I was able to check it off as we shopped. (A bonus? When you've checked off everything it says, "Hurray! You have everything!", and that made me smile.) You can also view your meal plan and recipes, which means I don't have to drag the laptop into the kitchen, which I HATE doing (I WILL someday spill something on it).

Now here's where I'll be interested to see how it goes NEXT week . . .when you check off something on your list, it puts it in your "Pantry". So there is a list of all this stuff that I have, but I don't know what happens when I cook with it -- do I have to manually erase it from the pantry, or will it do it automatically? Then, next week, if I add a recipe that needs ingredients that I have leftover from last week, will it tell me to buy more, or tell me that I already have it? I'll let you know. I think that will make or break this -- if it does what I want it to, it will be totally worth the price ($40 per year).

Sunday, March 6, 2011

Adventures in Cooking: Doughnuts

"Your doughnuts make me go nuts!!!"

I'm not sure how we got on the subject today, but it ended in a pretty severe craving for doughnuts. It may have come from a discussion about cravings, in which I described my inadequate breakfast the other day, and how I feared I would only be satisfied by a Bacon, Egg, and Cheese sandwiched between two chocolate frosted doughnuts. The discussion ended as many do, with a comment of "I/You could totally do that."

Challenge accepted.

Please note: I had to walk PAST Dunkin' Donuts to get to the grocery store to get the ingredients to make doughnuts. That's how hardcore I am.

Recipe:
http://www.wikihow.com/Make-Krispy-Kreme-Doughnuts
(I cut it in half to start)

Time to Make the Donuts!!! (2)

Time to Make the Donuts!!! (1)
I didn't have a "doughnut cutter", so I used a margarita glass and a shot glass! At least they're being used for something!

Time to Make the Donuts!!! (4)
I also learned 1) how to use a candy thermometer, and 2) that I actually had a candy thermometer in my drawer.

Frying:
Time to Make the Donuts!!! (6)

Time to Make the Donuts!!! (7)

Time to Make the Donuts!!! (8)

Time to Make the Donuts!!! (9)

Time to Make the Donuts!!! (12)


Varieties:
Time to Make the Donuts!!! (15)
Glazed!

Time to Make the Donuts!!! (18)
Chocolate Kreme

Time to Make the Donuts!!! (23)
Chocolate Frosted

Time to Make the Donuts!!! (25)
With Sprinkles!!!

Time to Make the Donuts!!! (26)
Donuts are for people who don't want to admit they're eating cake for breakfast.