Showing posts with label halloween. Show all posts

Monday, September 22, 2014

Commissioned Work - Brainstorm

It's been a long time since I brainstormed via blog!

It's also been a while since I posted anything about, you know, life. It's been a little crazy. Ro is in preschool now, which was rough for the first week or two. He's a pro though -- loves rules and order, schedules, and clear expectations, so school is a good fit. I'm still working hard trying to set up my Childbirth Classes ... well, they're set up, I just need people to SIGN UP!

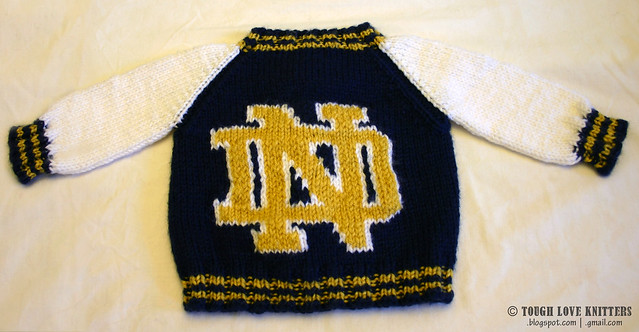
But in the meantime, my Etsy is blowin' up. People just love Pigeon Hats. And Notre Dame Sweaters. And I love when the Etsy app Cha-Chings at me when I make a sale. It's a lovely combination of joy and fear -- as in "Yea! I'm contributing financially to my family!" and "Am I going to have time to finish all this stuff in time?"
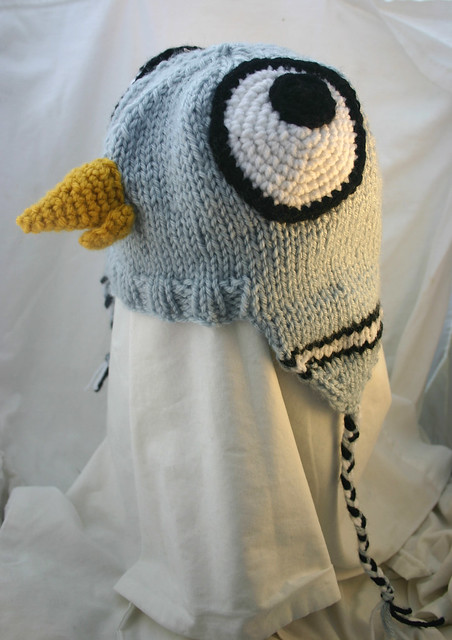
Pigeon Hat (8)  
Notre Dame Letterman Sweater


And then yesterday a woman from a FB group I'm in was looking for someone to knit a Bubble Guppies costume for her daughter for Halloween. An online friend tagged me in it, and I sent a link to my Etsy page, and I'm now going to be knitting a Oona Bubble Guppy costume for her! Woo!


There are a bunch of "mermaid" tail patterns, but mostly crocheted, so I'm going to have to come up with a knitted one. But I'm not worried. I'm pretty awesome.

Tail:

Height: Average 6 mo is about 25-26" tall; waist falls at about half their height, so about 13" from foot to waist (plus about 6-8" of fin). The picture above (which she shared with me as an idea of what she wants), the "tail" comes up to the child's waist. However Oona's "dress" technically covers her chest. I'm thinking a tall, ribbed belly band part will keep it stretchy and allow mom to adjust it up or down as she likes, maybe 4". I checked the height of some 6-month PJs, and they're about 12.5" from waist to feet. I'll keep it wide at the feet so her feet are not bunched up too much, and then decrease for the fins. Total height: about 4" for belly band, about 15" for body down to fin, about 6" for the fins.

Width: A 6-month old child's hips are about 20" around, and waist is about 19" around. She wants room for PJs underneath. Here's where I'm not sure about the "ease": for a sweater, you want the piece 2-4" bigger around than the body (so you have room too move and wear a layer underneath); but for a hat, you want it 2" or so smaller than the head (so it stretches and stays on). I want the ribbing stretchy and "tight" so it will stay up, but obviously with enough room for layers and movement. I'm thinking maybe 19" around for the ribbing (so it stretches to 21"), and then 22" around for the top of the legs.

Stripes: Oona's tail is purple and pink spiraly stripes. The photo above was make with just purple and a pink accent added to it; however Oona's real tail is about equal parts purple and pink. A traveling spiral like that is hard (impossible?) to do in the round, since you'd come back around to the beginning of a pink part and the pink yarn would be all the way over on the other edge of the pink section. It can be done flat though, and sewn up the seam (which I hate doing, but I like more for things to be pretty and correct).
So I think I'll do it flat and then sew up with an invisible stitch. The challenge is to make the spirals line up when the piece is folded. Now, if I were super cool, I would make it shaped like a spherical cone ... but that involved calculus, probably, and it's my mission to prove that calculus is useless. Algebra, on the other hand, I seriously use it every day. Go apologize to your 8th grade math teacher, I'm sure he's waiting for your call. Anyway, I decided to just fold it flat. To get the spirals to line up, you always have to have the same color on left edge AND the right edge of the piece. I copied a picture of Oona into photoshop, cropped off her head and arms, turned on the grid, and adjusted the image size so it fit my gauge (90sts across X 95 sts tall). I then copied her dress and placed the layers side-by-side. Wherever the color changed from purple to pink (or vice versa) on the left edge, I drew a line across the piece and made the right edge also change from purple to pink. Then I filled in the stripes in between in an interesting way, and boom, stripes that join when you fold the piece in half. For the decrease to the fins, I decreased each half evenly, 1 dec on each edge and 1 dec on either side of the center.


Fin:


Hat:
Pretty straightforward beanie, with pigtails (like I did for Braelyn's Abby Cadaby hat)
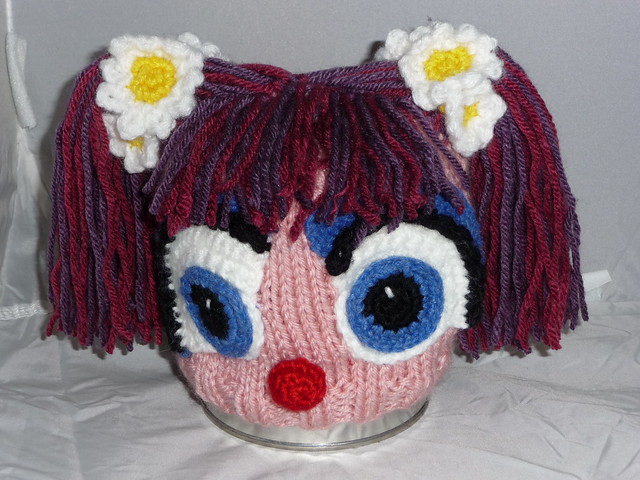
Abby Cadaby Hat

Probably ribbed brim (but no turn up, because the pigtails are at the bottom).
But ... how cute would a scalloped brim be for this? So it sort of looks like hair?!


Found a very subtle sea scalloped edge in Beyond the Edge (LOVE having technique books around).


There is also a Scalloped Cast on
f5666752-2

Though I'm not sure I like the hole it creates. The other option is to go back after the hat is done and crochet a scalloped edge on the brim. Crochet scalloped edge seems to be much more common, and it doesn't leave a large hole in the center of each ridge.

scalloped border


And finally a pink star applique.
Crochet Star Ornament pattern.  www.1dogwoof.com


Yarn:
Dusty Purple

I have about 1/4 of a skein in my stash

Pink
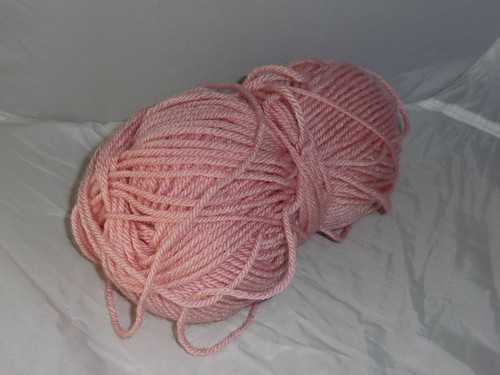
I was debating using a "brighter" pink, like a Magenta or Rose
Product 860-142
but I think that may be too purpley.
I'll have to see when I get to the store if it looks better than online.
Plus I have 1.95 skins of Pink, which should be enough.
**Yes, Magenta and Raspberry were too purpley. And even though Pink wasn't quite bright enough, none of the others were quite right. Pink it will be.

Just waiting for the PayPal to go through, and I'll be off!

Saturday, October 19, 2013

Halloween!

We're actually having a Halloween party this year! Ro has a few little friends (more like I have a few mom friends who have kids Ro's age), and some people from the neighborhood are going to come over. We'll have some snacks, some games for the kiddos, and maybe some liquor for the adults.

Now, we're trying to do this on a budget. (Chris has this whole "If we want to retire when we're 40 you can't buy coffee" sort of mentality right now.) So, to Pinterest it is (I needed a reason?). Also, some of the mommas are a little crunchy, so I'm looking for non-candy things to serve.

First Things First, Costumes:

Ro has been "Roar!"-ing for a few weeks now, so I decided he would enjoy being a monster for Halloween. (At first we had an idea to all be "60's Horror Movie Characters", because he looks like a child from Village of the Damned. I could be Rosemary's Baby, and just wear a nightgown and carry around my weird knitted Childbirth Ed doll, and Chris could be the guy from the Shining. But then I realized that Ro is old enough to 1) know what Halloween is, sort of, and 2) know what things are scary. So I didn't want things to be too scary, and also that I he wouldn't understand the irony of his costume. So Monster/Dinosaur it is.)

Plus this costume idea is relatively free.

DIY Halloween Costume : DIY Dinosaur Costume DIY Halloween

1 Sweatshirt (which he needed anyway)
3 Sponges (which we had under the sink)
Additional spots/teeth made of felt (which I had leftover from R's car mat)

And the best part, the sponges are glued to a string that I just pinned to the sweatshirt, so as of November 1, it magically becomes a sweatshirt again (though I may leave the felt teeth).

183

Still working on mine. Is "Monster Wrangler" a thing?


Snacks:

For munching and mingling ...

Grave-yard 7-layer dip. Adorb.
Graveyard Dip

Sweet Chex Mix with Reese's Pieces. Crack.
Perfect for Fall: Crunchy Peanut Butter Chex mix (with Reese's pieces)...


Hot ...

Mummies in a Blanket
Mummy Dogs

Witch Fingers (mozzarella sticks with marinara sauce)
fingers

Macaroni Jack-o-Lantern. Carve a round loaf like a pumpkin!


To take home, Apple Leather (a.k.a. Healthy Fruit Roll-ups)
Apple Cinnamon Fruit Leather Recipe from bakedbyrachel.com


Drink:

Apple Cider in the cast-iron "cauldron"
(Maybe a 'Witch's Brew' sign on it?)


Decor:
(again, remember I'm on a budget)

I love these vintagey banners. Banners are so easy to make (just print, cut, tape over a string or piece of yarn, tack to wall. Boom. Decorated).
Very Vintage Halloween Banner 1 by Malia Karlinsky - Yesterday on Tuesday, via Flickr

Spider-Web made from Trash Bag. Genius.


Paper Bats


Treats (for Kids):

A cross between ...
Crafty Halloween Goody Bags

and ...
photo instructions for origami gift bag

and you get ...
270
(Revised pattern and printable here).

They're a little small, which is GREAT for the whole budget thing, because I can only fit a fit a few little treats. Maybe some candy corn and a pack of stickers.


Games:

Monster Bowling
Monster Bowling
(Ro got these for his birthday from Uncle Josh, and they've been put away for a few months so he'll be super excited to see them again)

Pumpkin Decorating
I'm thinking each kid gets a little gourd, and I'll give them crayons, markers, stickers. I figure they can't do too much damage.

Coloring
Halloween color page, holiday coloring pages, color plate, coloring sheet,printable color picture
This site has all sorts of coloring pages for all different topics/holidays. I'll print out a few and let them go nuts.

I figure those, plus all of Ro's toys (which all the kids will love because they belong to someone else) will keep them entertained for 2 hours.

Origami Goody Bag

In searching for a pattern for a cute Halloween goody bag that did not include the directions, "Take a Paper Bag and ..." (because that involves purchasing paper bags, and not stealing copy paper from my office), I came across this page:

photo instructions for origami gift bag

Cute, but two issues: 1) the bag has the folds in the front, which makes drawing/printing a picture on it tricky, and 2) the page is in French. So I had to do a little playing.

In the end it's a really simple design, as long as you fold the paper in the right places FIRST. I've re-created the French directions below, but I also designed a cute printable template. This shows exactly where to fold the paper from the beginning (flat), so once you get all triangular and you know, folded, it's not so hard. It also shows you where to place your picture, if you want a picture.

Here we go:

1) Start with a sheet of 8.5X11" paper (paper with pictures shown below)

1

2) Fold the lower-right corner up to make a right-triangle. The top edges should be flush. Unfold.

2a
2b

3) Fold the upper-right corner up to make a right-triangle. Bottom edges should be flush. Unfold.

3a
3b

4) Fold the top edge down and the bottom edge up in thirds. Top end should be flush with seam of bottom fold. Unfold. (Later I will cause this crease the "1/3 crease")

4a
4b

5) Turn over and fold paper in half longways (hot-dog).

5a
5b

6) Pinch opposite diagonal folds and bring together. The intersection of the diagonal folds will become a point. Close into a triangle with folded rectangle on left side. (I know, that's the really tricky part. The pictures probably make more sense than my words.)

6a
6b
6c

7) Fold Left flat along the "1/3 crease".

7a
7b

8) Fold right flap along the "1/3 crease".

8a
8b

9) Fold top point down. Unfold.

9a
9b

10) Turn over and repeat steps 7, 8, and 9. (Later I will call these the "1/3 folds".)

10
11

11) Fold bottom square up to crease. Unfold. Turn over and repeat.

12a
12b

12) Fold longways (hot-dog) to crease. Unfold. Turn over and repeat.

13a
13b

13) Cut along creases of bottom square.

14a
14b

14) Flatten top point into square, keeping "1/3 folds" together.

15

15) Fold the "bottom square" of each "1/3 fold" down into box.

16a
16b

16) Fold down flap of final "bottom square".

17

17) Fold the sides in, bringing the front and back top edges together.

18a
18b

18) Fold flap over.

19

19) Decorate and fill with goodies (optional, but recommended).

010
077


Here is a basic layout of where a picture would go.

087

Here are some digital layers. Print at 8.5x11" paper.

Fold Lines
Fold Lines

Layout for Image
Gift Bag Layout

GIft Bag Layout 2
I also have this as a MS Publisher File. If you've come across this and want to edit it yourself, lemme know and I can find a way to upload that as well.

Needs some Halloween gift bags?

270

pumpkin gift bag

Ghost Gift bag

Frankenstein gift bag

Witch Gift Bag