Monday, September 22, 2014

Commissioned Work - Brainstorm

It's been a long time since I brainstormed via blog!

It's also been a while since I posted anything about, you know, life. It's been a little crazy. Ro is in preschool now, which was rough for the first week or two. He's a pro though -- loves rules and order, schedules, and clear expectations, so school is a good fit. I'm still working hard trying to set up my Childbirth Classes ... well, they're set up, I just need people to SIGN UP!

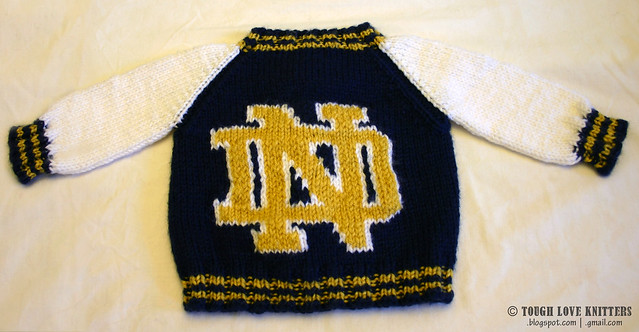
But in the meantime, my Etsy is blowin' up. People just love Pigeon Hats. And Notre Dame Sweaters. And I love when the Etsy app Cha-Chings at me when I make a sale. It's a lovely combination of joy and fear -- as in "Yea! I'm contributing financially to my family!" and "Am I going to have time to finish all this stuff in time?"
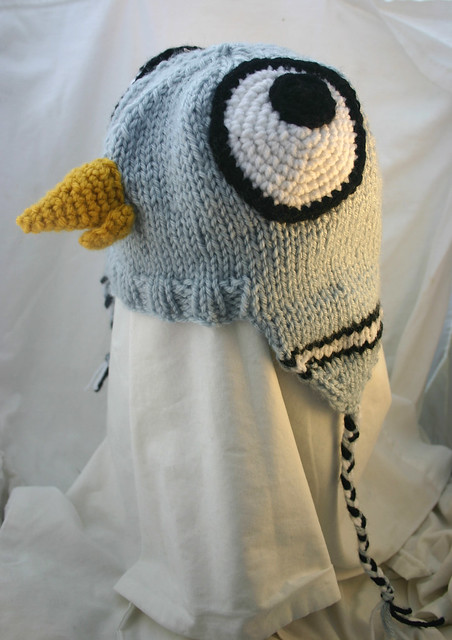
Pigeon Hat (8)  
Notre Dame Letterman Sweater


And then yesterday a woman from a FB group I'm in was looking for someone to knit a Bubble Guppies costume for her daughter for Halloween. An online friend tagged me in it, and I sent a link to my Etsy page, and I'm now going to be knitting a Oona Bubble Guppy costume for her! Woo!


There are a bunch of "mermaid" tail patterns, but mostly crocheted, so I'm going to have to come up with a knitted one. But I'm not worried. I'm pretty awesome.

Tail:

Height: Average 6 mo is about 25-26" tall; waist falls at about half their height, so about 13" from foot to waist (plus about 6-8" of fin). The picture above (which she shared with me as an idea of what she wants), the "tail" comes up to the child's waist. However Oona's "dress" technically covers her chest. I'm thinking a tall, ribbed belly band part will keep it stretchy and allow mom to adjust it up or down as she likes, maybe 4". I checked the height of some 6-month PJs, and they're about 12.5" from waist to feet. I'll keep it wide at the feet so her feet are not bunched up too much, and then decrease for the fins. Total height: about 4" for belly band, about 15" for body down to fin, about 6" for the fins.

Width: A 6-month old child's hips are about 20" around, and waist is about 19" around. She wants room for PJs underneath. Here's where I'm not sure about the "ease": for a sweater, you want the piece 2-4" bigger around than the body (so you have room too move and wear a layer underneath); but for a hat, you want it 2" or so smaller than the head (so it stretches and stays on). I want the ribbing stretchy and "tight" so it will stay up, but obviously with enough room for layers and movement. I'm thinking maybe 19" around for the ribbing (so it stretches to 21"), and then 22" around for the top of the legs.

Stripes: Oona's tail is purple and pink spiraly stripes. The photo above was make with just purple and a pink accent added to it; however Oona's real tail is about equal parts purple and pink. A traveling spiral like that is hard (impossible?) to do in the round, since you'd come back around to the beginning of a pink part and the pink yarn would be all the way over on the other edge of the pink section. It can be done flat though, and sewn up the seam (which I hate doing, but I like more for things to be pretty and correct).
So I think I'll do it flat and then sew up with an invisible stitch. The challenge is to make the spirals line up when the piece is folded. Now, if I were super cool, I would make it shaped like a spherical cone ... but that involved calculus, probably, and it's my mission to prove that calculus is useless. Algebra, on the other hand, I seriously use it every day. Go apologize to your 8th grade math teacher, I'm sure he's waiting for your call. Anyway, I decided to just fold it flat. To get the spirals to line up, you always have to have the same color on left edge AND the right edge of the piece. I copied a picture of Oona into photoshop, cropped off her head and arms, turned on the grid, and adjusted the image size so it fit my gauge (90sts across X 95 sts tall). I then copied her dress and placed the layers side-by-side. Wherever the color changed from purple to pink (or vice versa) on the left edge, I drew a line across the piece and made the right edge also change from purple to pink. Then I filled in the stripes in between in an interesting way, and boom, stripes that join when you fold the piece in half. For the decrease to the fins, I decreased each half evenly, 1 dec on each edge and 1 dec on either side of the center.


Fin:


Hat:
Pretty straightforward beanie, with pigtails (like I did for Braelyn's Abby Cadaby hat)
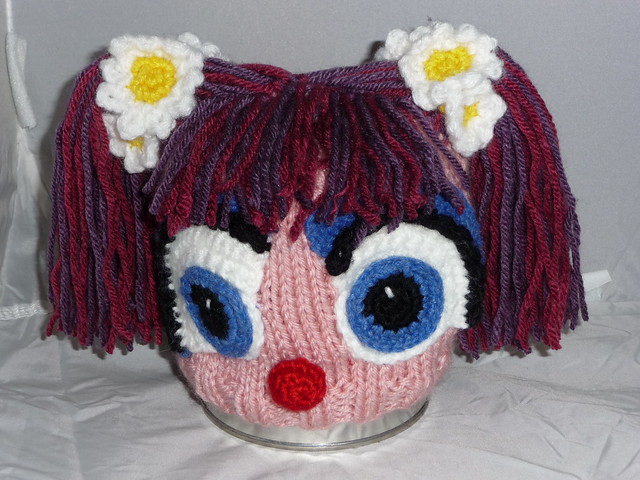
Abby Cadaby Hat

Probably ribbed brim (but no turn up, because the pigtails are at the bottom).
But ... how cute would a scalloped brim be for this? So it sort of looks like hair?!


Found a very subtle sea scalloped edge in Beyond the Edge (LOVE having technique books around).


There is also a Scalloped Cast on
f5666752-2

Though I'm not sure I like the hole it creates. The other option is to go back after the hat is done and crochet a scalloped edge on the brim. Crochet scalloped edge seems to be much more common, and it doesn't leave a large hole in the center of each ridge.

scalloped border


And finally a pink star applique.
Crochet Star Ornament pattern.  www.1dogwoof.com


Yarn:
Dusty Purple

I have about 1/4 of a skein in my stash

Pink
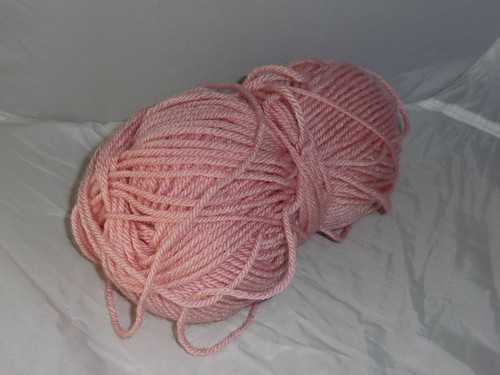
I was debating using a "brighter" pink, like a Magenta or Rose
Product 860-142
but I think that may be too purpley.
I'll have to see when I get to the store if it looks better than online.
Plus I have 1.95 skins of Pink, which should be enough.
**Yes, Magenta and Raspberry were too purpley. And even though Pink wasn't quite bright enough, none of the others were quite right. Pink it will be.

Just waiting for the PayPal to go through, and I'll be off!

Tuesday, September 16, 2014

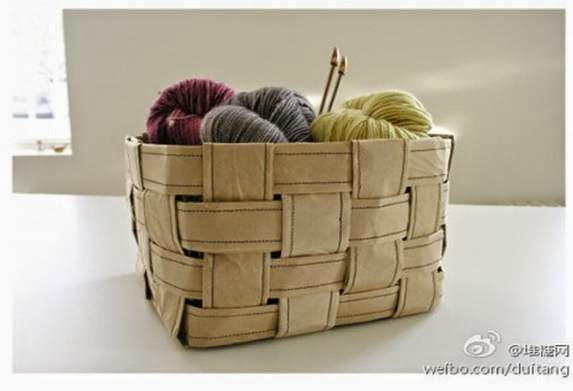
Paper Bag Basket

I'm doing some gift baskets for marketing purposes. Last time I just went to The Good Will and got a few baskets for $.50 or so each. But it was hard to find ones that were 1) not ugly, and 2) the size I wanted. Also I wasn't convinced of their cleanliness, and I wasn't sure how to wash them. Plus that's money, even if it's $.50. And it feels weird to have to go back and buy more baskets every time I want to do this.

To the PINS!

Found this ...

DIY Upcycled Fruit Basket

and this ...


Both of them have the strips folded over the top and back down into the basket, which I didn't want to do (because it would mean the strips had to be pretty long).

Here's how I did mine ...

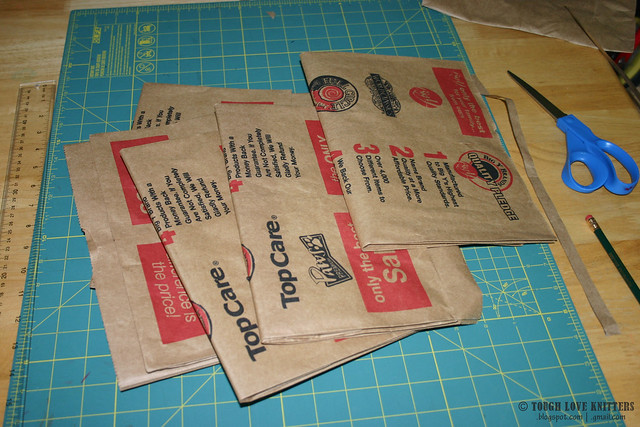
1) Stock up on (or steal) some paper bags from the local grocery store. *Hint: hit up a self-checkout lane and double-bag to your heart's content. Also that rack of self-scanner guns at our Stop and Shop has a stack of bags so you can bag your groceries as you shop -- grab a stack and run!

Paper Bag Basket (1)

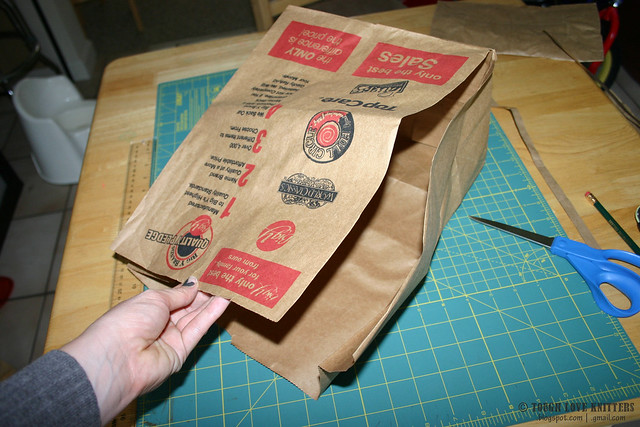
2) Cut the bag flat (like you would to make a book-cover). Cut up one seam, then around the base of the bag. 

Paper Bag Basket (2)

Paper Bag Basket (3)

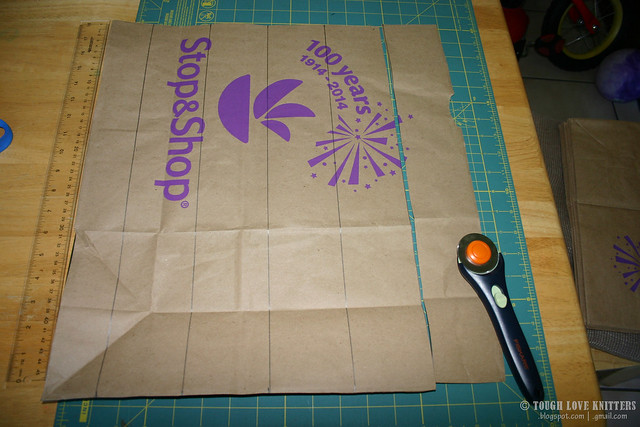
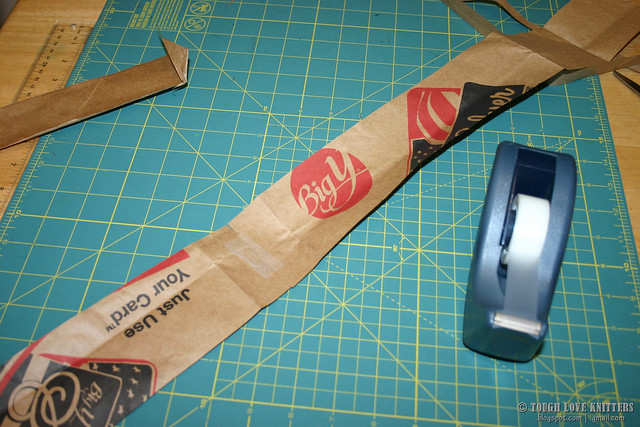
3) Decide how long and how wide you want your strips. I made mine 3" wide, so when folded over they'd be about 1.25" wide, because that seemed to look nice. I wanted my basket to be about 9" square, which means the strips needed to be 18" long (9" across the bottom, and 4.5" up each side). 
Measure and cut.

Paper Bag Basket (4)

Paper Bag Basket (5)

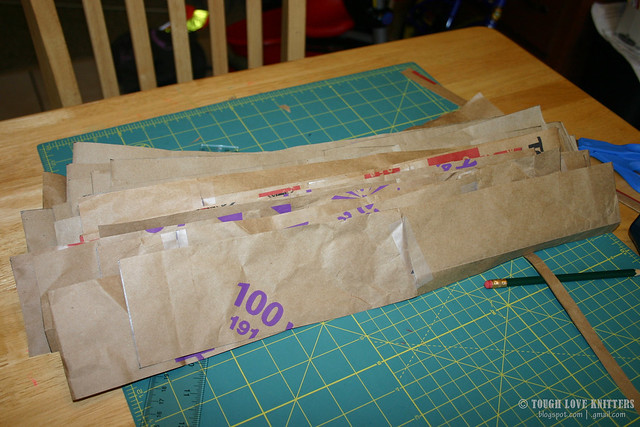
**Now, I'll be honest, I came to that 18" long because the bags I used first were 18" long. It just happened to work out really well. However, at my next shopping trip, they only had smaller bags (about 14-15" long), so I cut 3" wide strips, taped them together, and then cut 18" strips from that.

Paper Bag Basket (6)

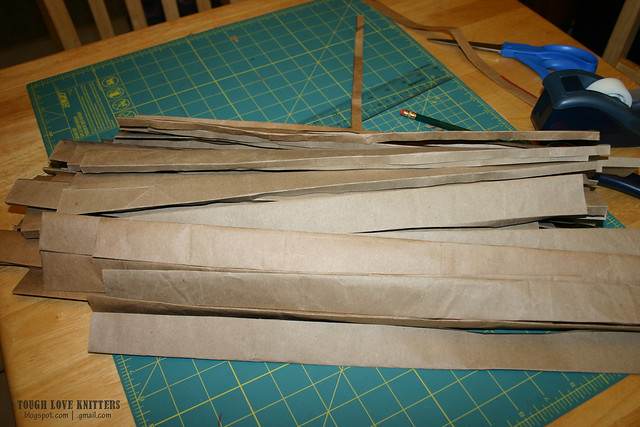
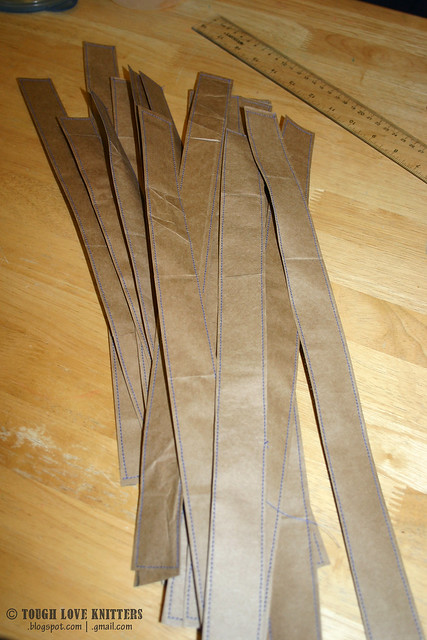
However you do it, you'll end up with a pile of strips. You'll need 20 strips for this basket (it will vary for different sizes).

Paper Bag Basket (8)


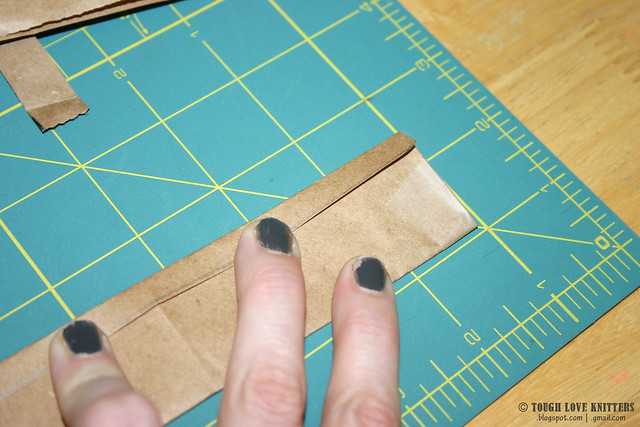
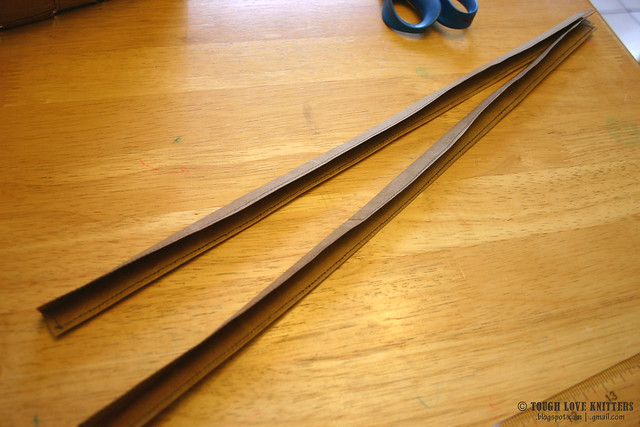
4) Fold the strips hot-dog style, leaving about a 3/8" to 1/2" lip.

Paper Bag Basket (9)

Then fold the lip over.

Paper Bag Basket (10)

Do that 19 more times. 

Paper Bag Basket (11)

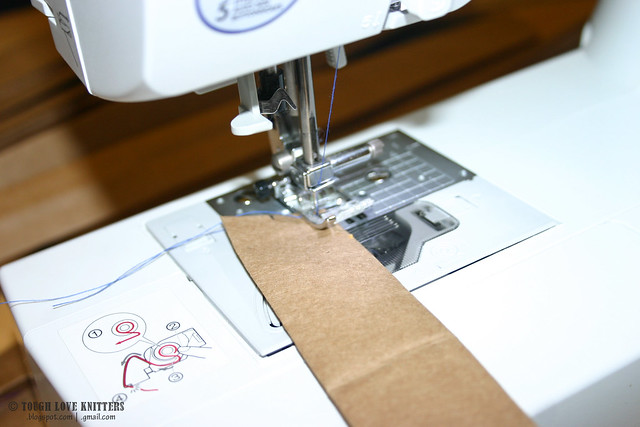
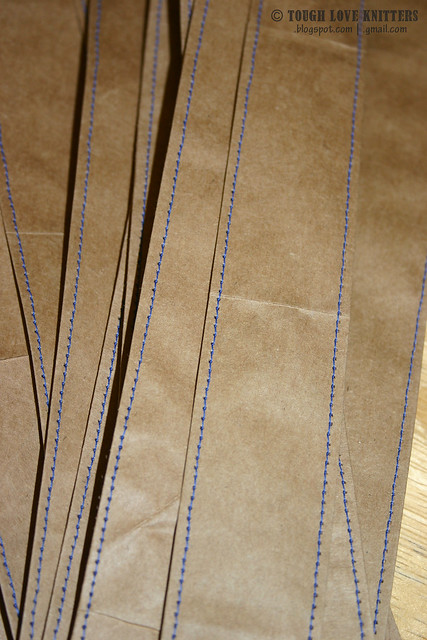
5) Now pick your color! Sew around folded strip, back-stitching or lock-stitching at the beginning and end.

Paper Bag Basket (12)

Paper Bag Basket (13)

Paper Bag Basket (14)

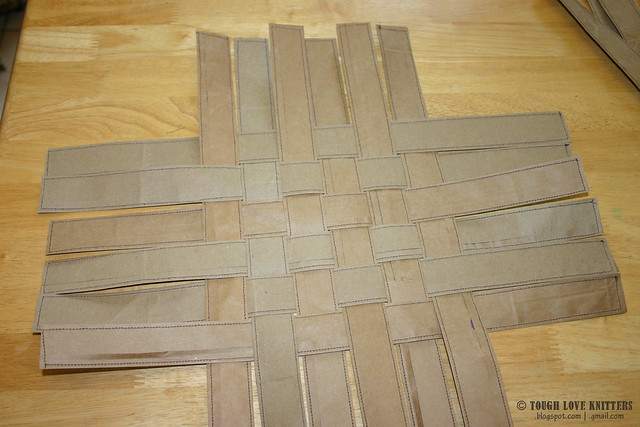
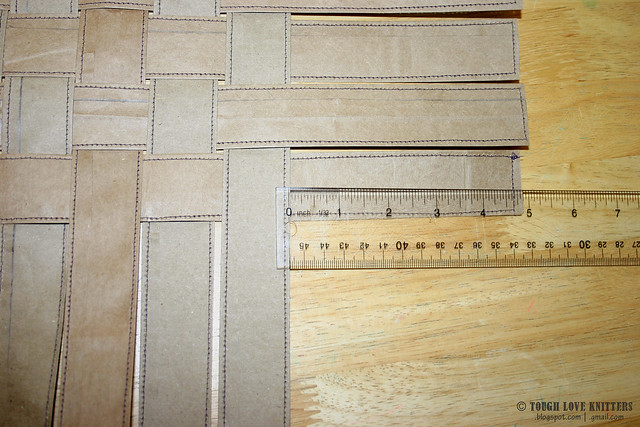
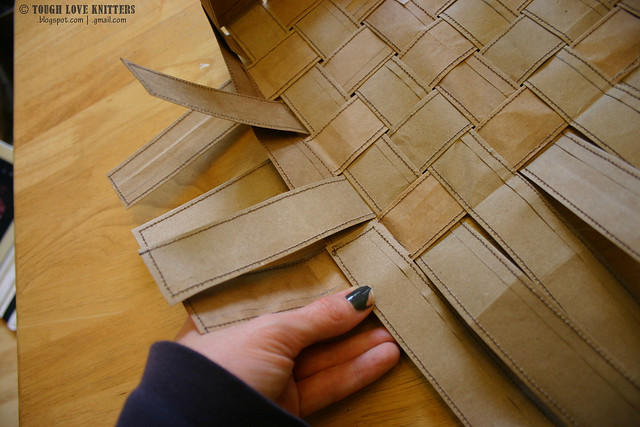
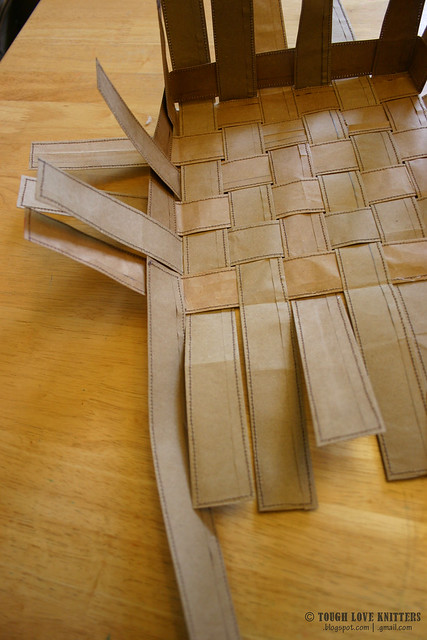
6) Lay six strips (or however many you're using) right-side down, then basket-weave six more strips through them. Keep them straight and tight.

Paper Bag Basket (15)

Check that the weaves are centered by measuring the strips on each side.

Paper Bag Basket (16)

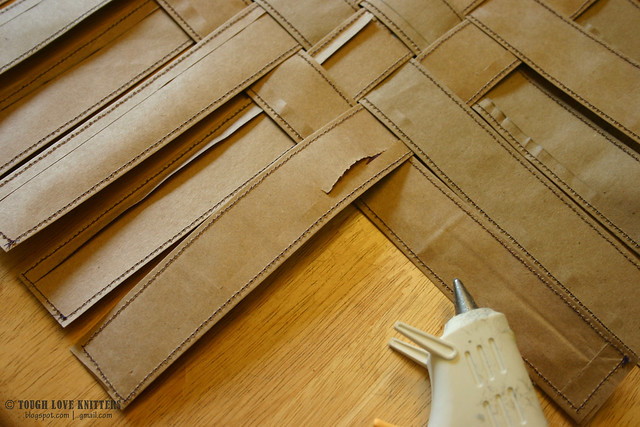
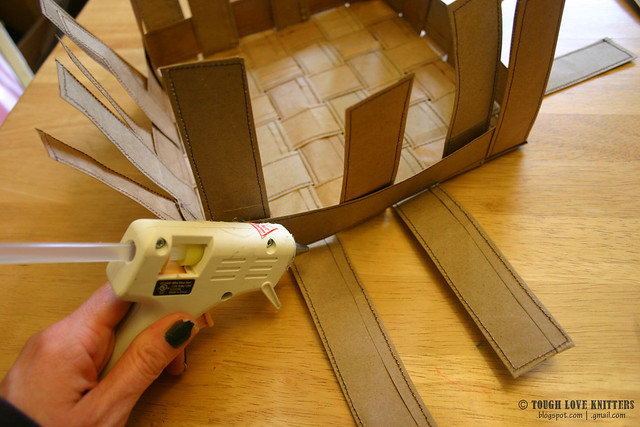
7) Hot glue the corners and under each strip along the edge.

Paper Bag Basket (17)

Paper Bag Basket (18)

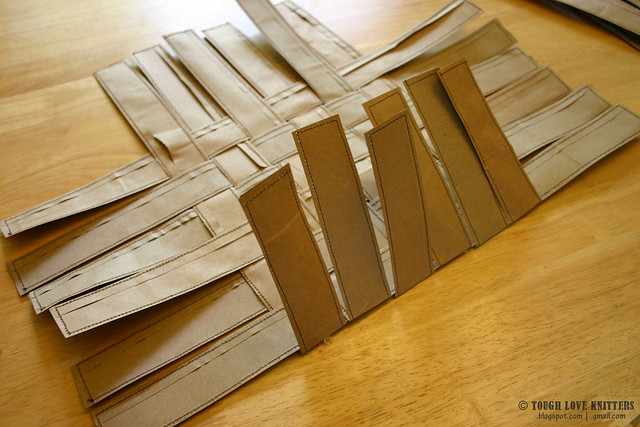
8) Fold up each strip to make a crease for the corner.

Paper Bag Basket (19)

Paper Bag Basket (20)

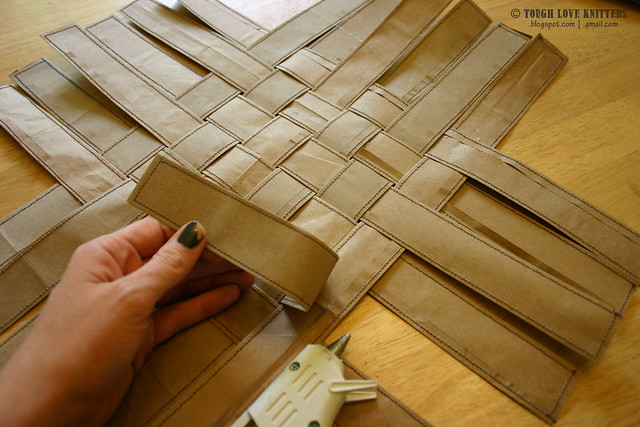
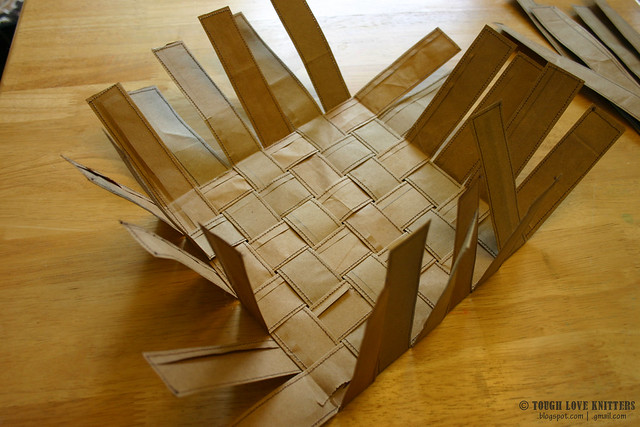
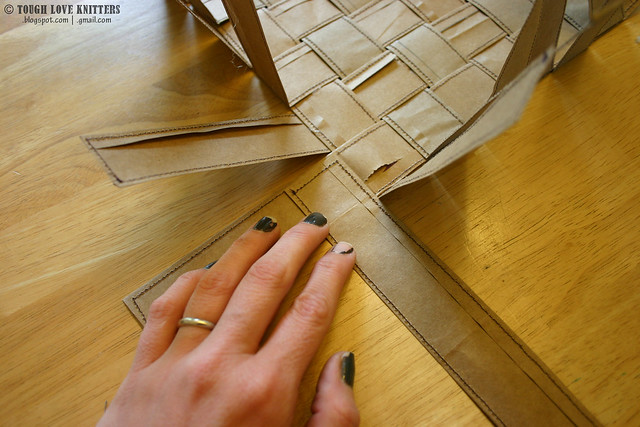
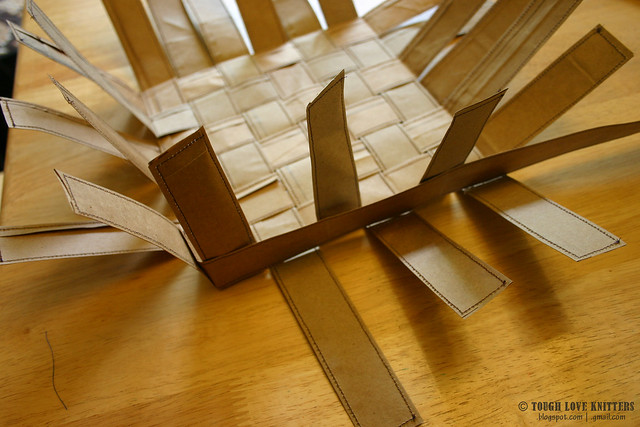
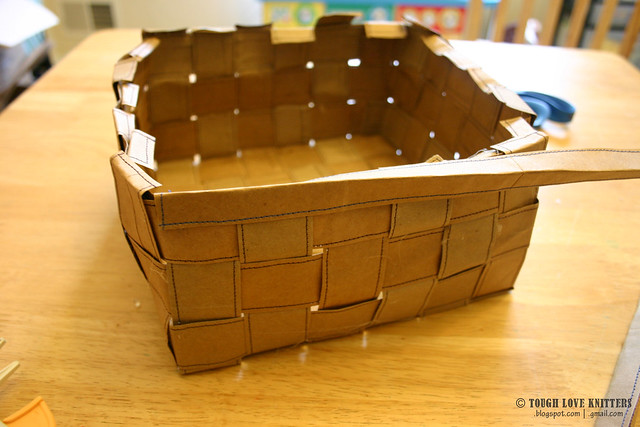
9) Attach another strip, following the basket-weave pattern around the edge.

Paper Bag Basket (21)

Paper Bag Basket (22)

Paper Bag Basket (23)

Attach another to make it all the way around, if needed.

Paper Bag Basket (24)

Paper Bag Basket (25)

Attach with hot glue.

Paper Bag Basket (26)

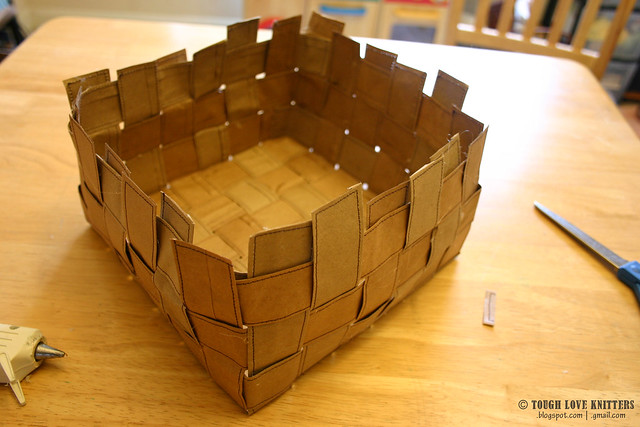
Repeat with more strips around until you reach the top of your basket.

Paper Bag Basket (28)

10) Fold over any excess strips so the top is even all the way around.

Paper Bag Basket (31)

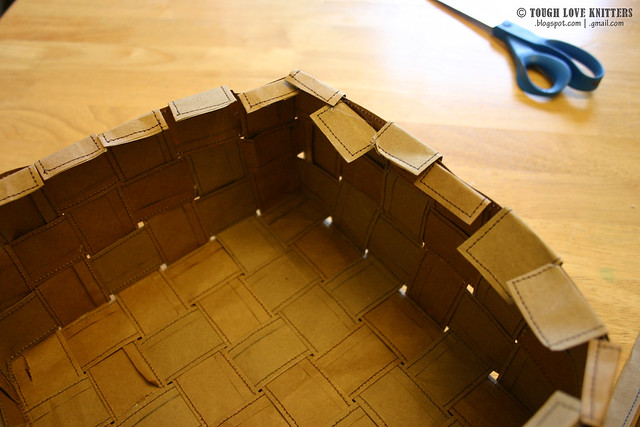
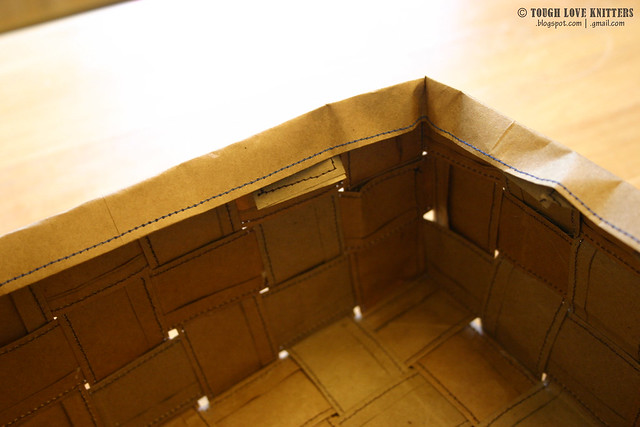
11) Take the final two strips and fold them hot-dog style.

Paper Bag Basket (30)

12) Glue the folded strip over the top of the basket, all the way around.

Paper Bag Basket (33)

Trim any tips of strips still poking out.

Paper Bag Basket (34)

Make sure to glue underneath all folded pieces to the top layer lays flat.

Paper Bag Basket (35)

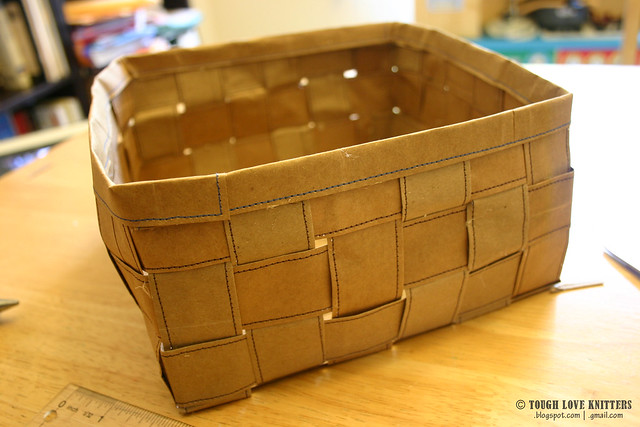
And you're done!

Paper Bag Basket (39)


**Note: because this is made out of paper bags, it will NOT be water-proof. I might try a clear spray-paint on one someday, but until then, it's just for dry things.

Monday, September 1, 2014

Learn something new

T-1 day until the kiddo goes to preschool. And since I'm a slacker and don't have a real job -- instead deciding to go on the Wonder Woman track and have 6 jobs -- I'm taking time to actually learn some good techniques to make my knitting look better.

Just this week I've learned ...

Corrugated Ribbing, where you change colors ribbing to make vertical stripes. Tip: When carrying the yarn across the back, keep it loose so there's room for the ribs to stretch. Also, if you wrap the yarn the same way every time, it makes a very neat pattern on the wrong side (though it does mean you have UNwrap it more often).

Cast on Ribbing. I thought I knew how to do this, but it turns out my made-up way is not actually the right way. This way (where you insert your needle IN BETWEEN the stitches (instead of through the front loop) makes a very nice, stretchy rib and a clean edge -- great for mittens and hats. Also a 2x2 rib variation here.

Jogless Stripes in the Round. I swear I look this up every time (for knitting and crochet) and never remember how to do it.

Attaching Granny Squares. My Granny Square Christmas Tree Skirt is almost done ... just have to attach all the squares together. Uhg. I like the Invisible stitch, because it's, well, invisible. And it won't add any volume to the skirt, since it's already HUGE!

Monday, August 18, 2014

Burnt Out Wonder Woman


I've also been searching for the perfect Burnt Out Wonder Woman meme, where we see her the day AFTER being so Wonder-ful, saving the day and taking care of shit. Cause the next day I'm sure she's totally strung out and can't seem to form a complete thought, get anyone dressed, or feed them anything remotely resembling food.

The past few weeks have felt like that -- alternating between being a kick-ass multi-tasker and a bumbling bag lady still in her PJs at 11am ... ok 5pm. It seems I can never quite find that middle ground, that happy medium between productive and relaxed, where the house is clean but not obsessive, the parenting is "just right" -- good enough, because anything more than that is, let's be honest, lost on the 3 year old.

No, I'm only ever at one extreme or the other. Let's take last week. Freelance gig revved into high gear and I did 20 hours of work from my kitchen table; D's wedding handkerchiefs are due oh so very soon that I'm pressing and hemming fabric next to my laptop while simultaneously rendering said freelance gig; Newborn Care class on Saturday meant I was finalizing the lesson plan and practicing the lesson with the child (luckily, bathing and diapering a baby doll is the same as 'playing', so 2 birds); and Etsy is doing very nice things for me lately, so DURING class on Saturday I got an order for a Notre Dame Baby Sweater (Go Irish, indeed). Also, you know parenting. And general self-care. And the keeping of the house. My husband said that he wouldn't let me become a "home-maker", which is why, I think, he's so willing to take the kiddo (and the dog) away on Saturday mornings so I can teach class. And some weeks I'm totally on top of things like dinner -- remembering to defrost something deserves a freaking medal. And when I set up activities for the child, I'm all "give me a mom of the year award, please".

But more often than not, those weeks when I do 3 out of 7 of my jobs at once (freelance TV planner, Childbirth Educator, Knitter/home-made wedding favor-maker), the last four (house-keeper, mother, wife, self) usually get thrown to the back-burner and left to boil over/burn/curdle. I let the kid watch movies all day, I don't shower to eat anything good, and we have pasta and meatballs for dinner -- and don't get me wrong, pasta and meatballs are awesome, so I'm usually not too worried about that one. It's when the kid eats cereal for the 5 meals and snacks leading up to pasta and meatballs that I start of feel guilty.

Oh the guilt. Really, it's when I let any of these 7 jobs slide. I feel like I'm not networking my classes enough, I'm not getting D's handkercheifs done fast enough. And heaven forbid I take a day/night off to just chill out with a book. And it's all me ... no one else is putting pressure on me except me. But I'm a bitch, so when I do it it's totally not in a nice way.

But the alternative is actually DOING all 7 of the jobs, after which I am so burnt out that I can't do ANY of them. Cue mom and kid in their jammies all day, effing around on facebook. Aaaaaand cue more guilt.

Maybe more lists is the answer?

Tuesday, August 12, 2014

Words of encouragement

Made especially for The Unstoppable Mrs. Kinne.


Toddlers are hard. Babies are hard. Nursing is hard. Parenting is hard. Work is hard. Life is hard.

But you're Amazing. Loving. Generous. Talented. Smart. Unstoppable.


And yes ... Awesome.

Tuesday, June 3, 2014

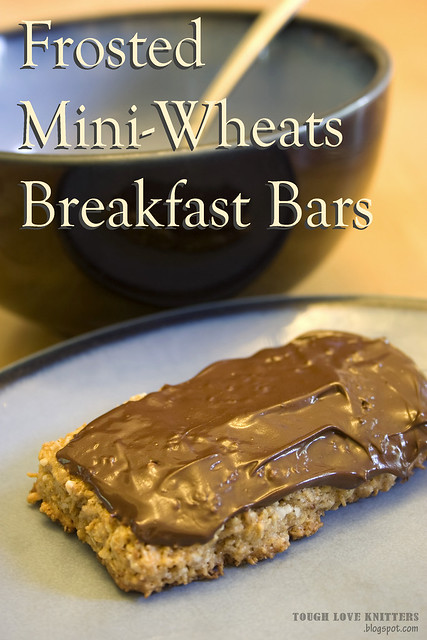
Frosted Mini-Wheats Breakfast Bars

Frosted Mini Wheats Cereal Bars - Title

We eat a lot of cereal. A lot. Ro's favorite is "Wheats" (Frosted Mini-Wheats). And because we eat so much cereal, we've come up with ways of stretching that cereal budget. When it comes time to stock up on diapers and wipes (and dog food, and paper towels, and toilet paper, etc.), we do an Amazon Subscribe & Save order. If you order enough stuff, the discount is even more, and one of the things you can order is Frosted Mini-Wheats. Also, the Malt-o-Meal brand is a very nice rip-off. Both of these solutions, however, result in a vast increase in the amount of leftover frosted wheat shreds at the bottom of the bag once the cereal has been eaten (the Malt-o-Meal just has a lot of shreds, and the Subscribe and Save order tends to find the box crushed by the dog food, so ... our bad, I guess).

So what do you do with those shreds? (Is "shreds" a word?) Throw them out?! "Oh no," said my friend Andrea, who apparently eats as much cereal as we do. She developed a recipe for her own Frosted Mini-Wheats Breakfast Bars, and they are delicious.

MiniWheatBars1b

** Side-note, I finally decided to learn to take proper pictures of food, because SOMEONE [eh-hem, Christopher] has been dragging his feet on actually writing his cooking blog, the one he's been talking about for at least a year. I figure if I can take some good pictures of his cooking, he'll actually write down his recipes. So these are my first attempts at REAL foodie shots. **

Also, understand that you need A LOT of shreds to make these, so you'll have to save them up over a few boxes. For a Printable version of this recipe, click the "Print Friendly" button at the bottom of this post.


Frosted Mini-Wheats Breakfast Bars
Re-printed with permission from Andrea Williams Wan.


Makes 10-12 bars.

Ingredients:
3 cups frosted mini wheat shreds
1/2 cup flour
1 1/2 tsps cinnamon
1 tsp salt
1/4 cup shortening
2 tbsp butter, softened
1 tsp vanilla
3 eggs
1/2 cup chocolate chips

Frosted Mini Wheats Cereal Bars (1)

Directions:

1) Preheat oven to 350 degrees.

2) In a large bowl, mix mini-wheat shreds, flour, cinnamon, and salt.

Frosted Mini Wheats Cereal Bars (4)

3) Add shortening, butter, and vanilla, and mix with an electric mixer on low. Add eggs, mixing after each egg.

Frosted Mini Wheats Cereal Bars (5)

4) Form into half-inch thick bars of desired size and place on parchment paper-lined cookie sheets.

5) Bake for 8-10 minutes, until bottoms are toasted. Cool on a wire rack.

Frosted Mini Wheats Cereal Bars (6)

6) Melt chocolate in microwave or in a glass bowl over a pan of boiling water. Stir as chocolate melts.

Frosted Mini Wheats Cereal Bars (9)

7) Drizzle or spread melted chocolate on top of bars.

Frosted Mini Wheats Cereal Bars (14)

Store in sealed container ... if you don't eat them all on the first day.

Frosted Mini Wheats Cereal Bars (17)